Table of contents
The Easy Way to Remove Acrylic Wax from Hardwood Floors
Fading and Discoloration:
Gather Your Supplies:
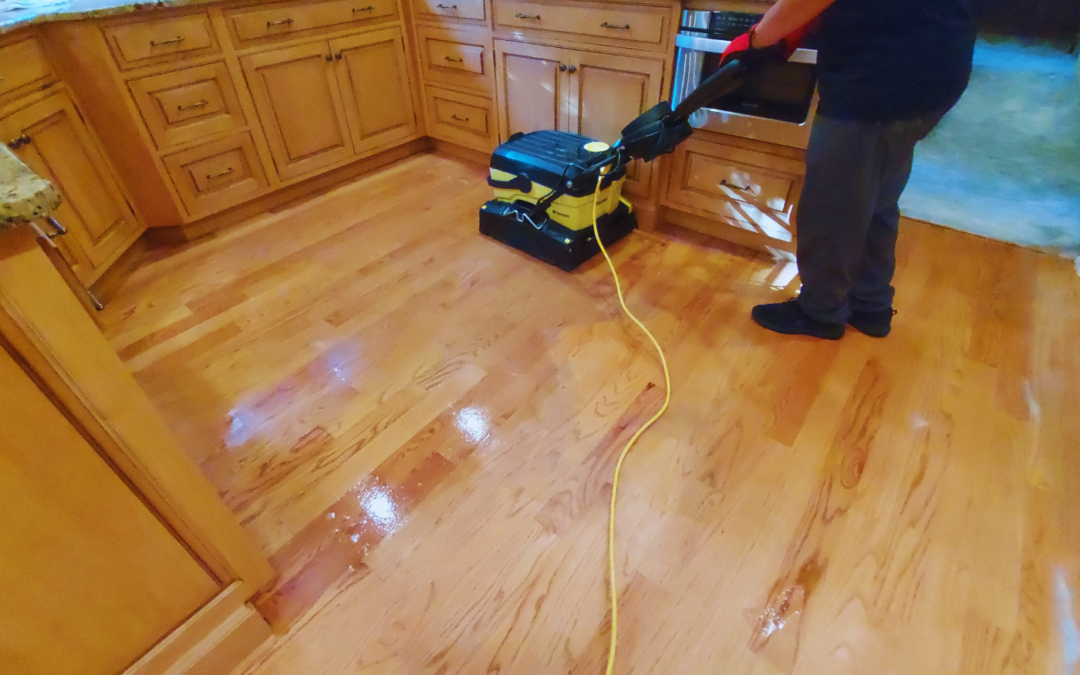
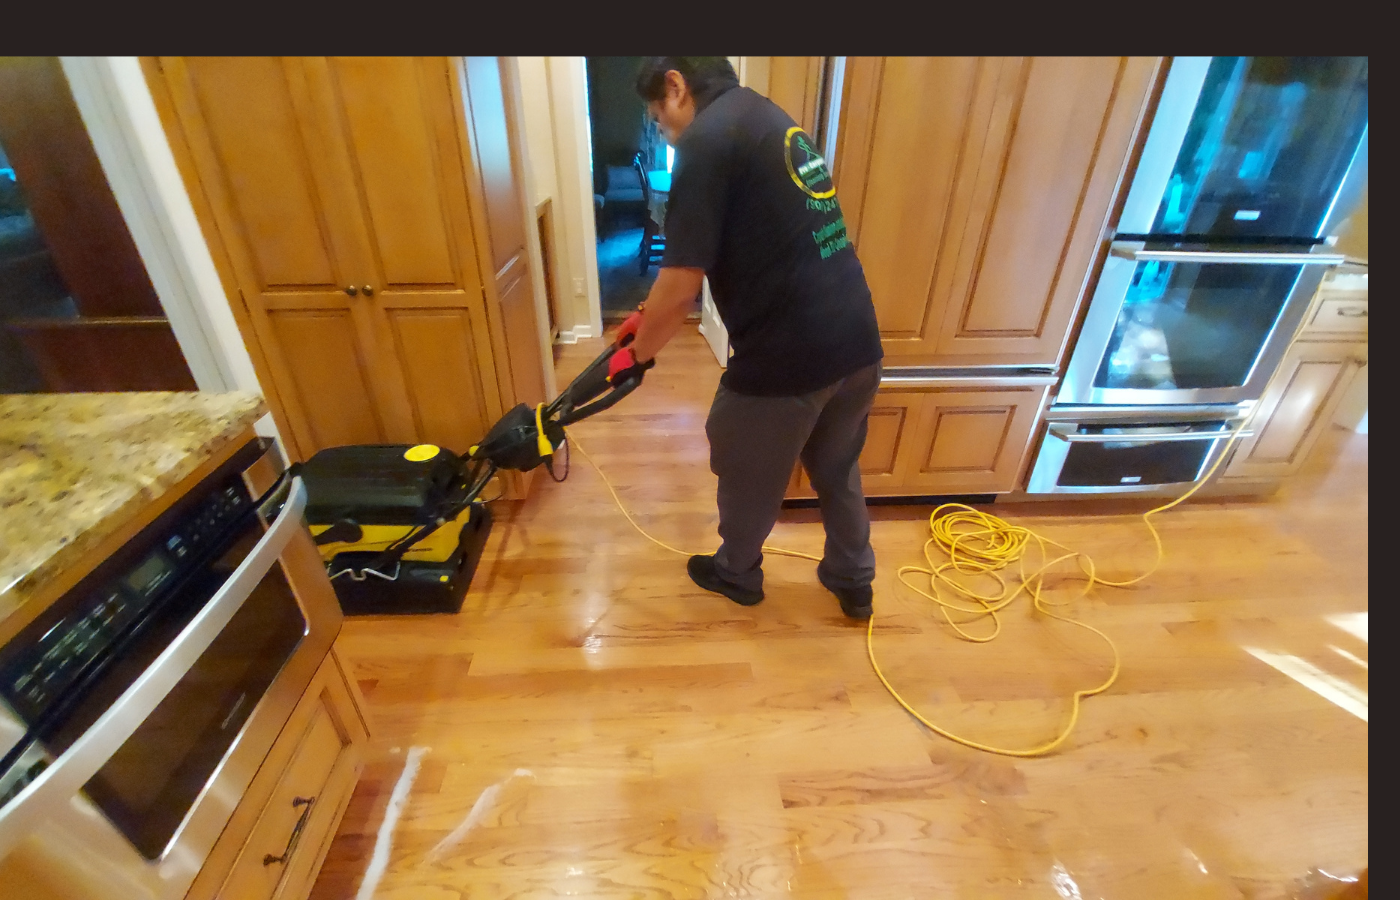
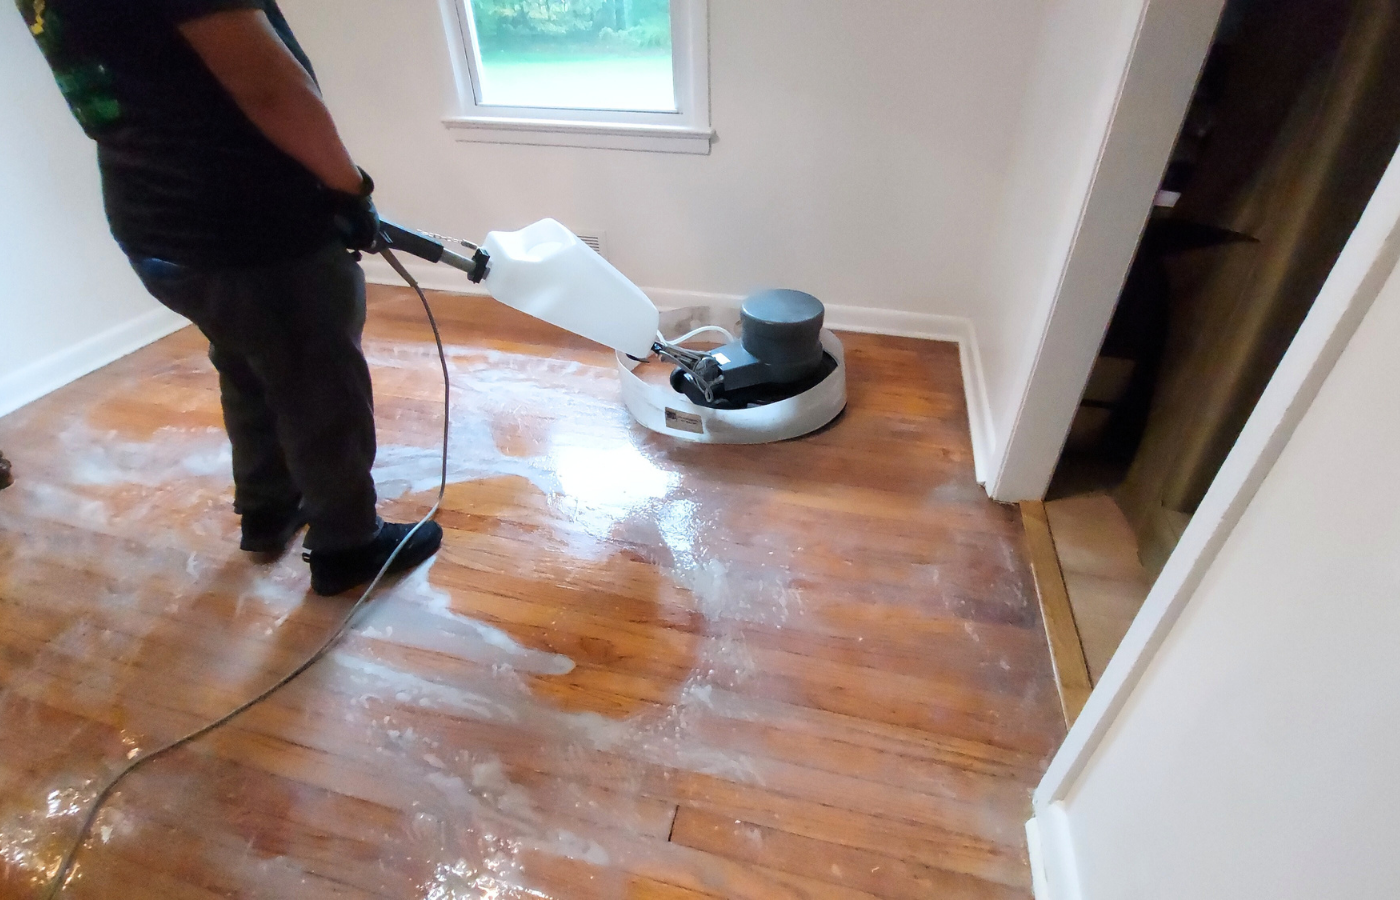
Wax removal process
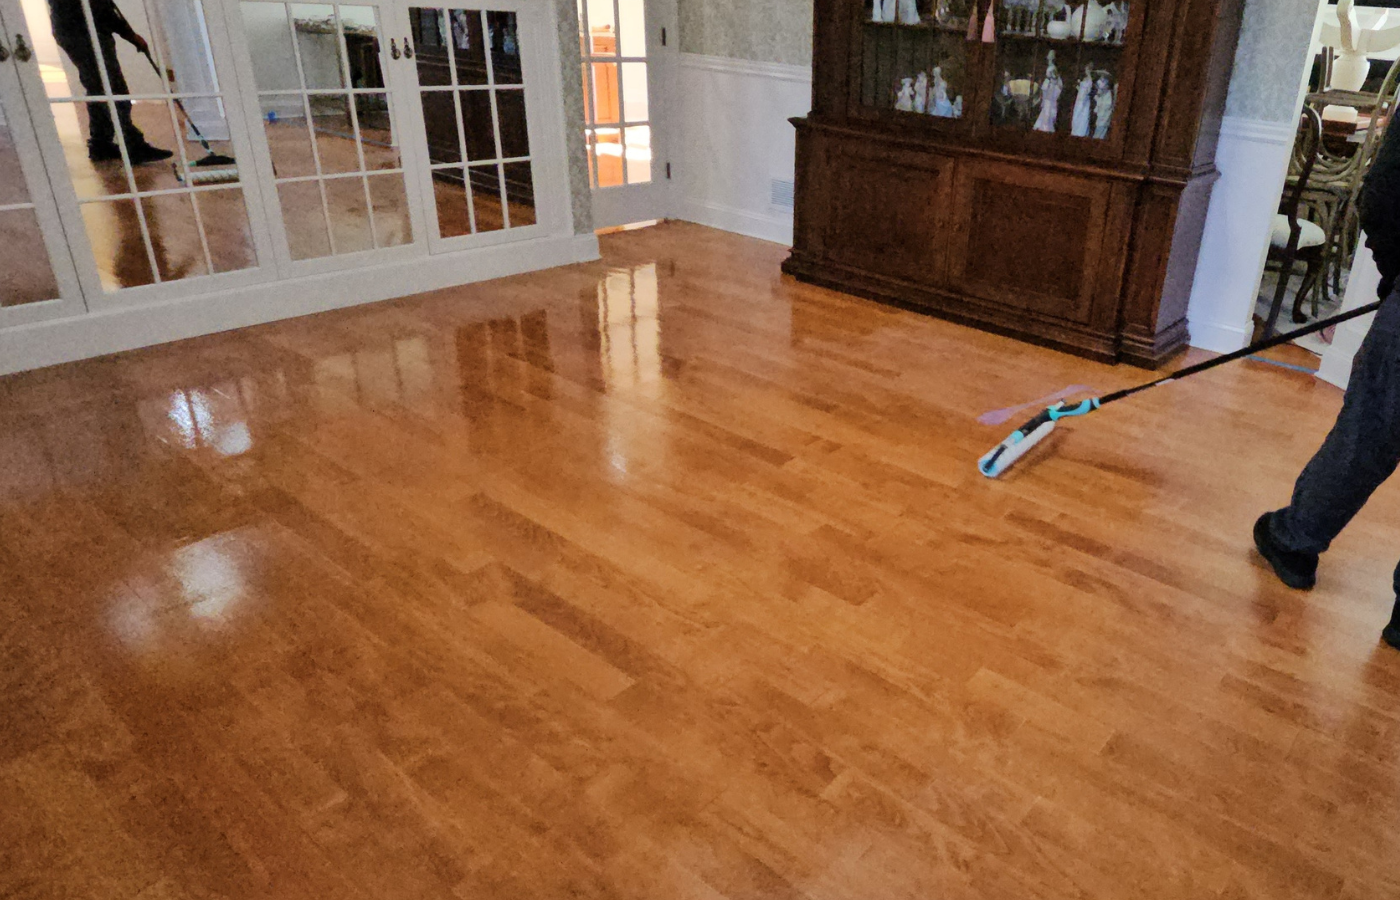
Hardwood floor wax free
General Questions
The Easy Way to Remove Acrylic Wax from Hardwood Floors
Maintaining the natural beauty of hardwood floors requires regular cleaning and attention to detail. However, when acrylic wax builds up over time, it can dull the sheen and create a sticky residue that is challenging to remove. but, there are easy and effective methods to restore the luster of your hardwood floors without causing any damage. In this article, we will explore step-by-step techniques for effortlessly removing acrylic wax and bringing back the shine to your hardwood surfaces
Get prepared for wax removal
Before diving into the cleaning process, take a moment to assess the extent of the acrylic wax buildup on your hardwood floors. Identify high-traffic areas and spots that may require extra attention. This initial evaluation will help you tailor your cleaning approach for optimal results.


Gather Your Wax Removal Supplies:
- Mineral spirits
- Plenty of clean cloths
- Steel wool
- Mop
- Sweep or Vacuum the Area: Before applying any cleaning solution, sweep or vacuum the hardwood floors to remove loose dirt and debris. This step prevents scratching during the cleaning process and ensures that the cleaning solution can penetrate the acrylic wax effectively.
- Create a Gentle Cleaning Solution: Mix a few drops of mild dish soap with warm water in a bucket. For an added boost, you can incorporate a small amount of white vinegar. This solution provides a gentle yet effective cleaning agent that won’t harm the hardwood surface while effectively breaking down the acrylic wax.
- Spot Test: Before applying the cleaning solution to the entire floor, perform a spot test in an inconspicuous area. This will help you ensure that the solution is safe for your specific hardwood type and finish. If there are no adverse reactions, proceed with confidence.
- Apply the Cleaning Solution: Dip a microfiber cloth into the cleaning solution and gently rub the affected areas. For stubborn spots, use a soft-bristle brush to agitate the acrylic wax. Be cautious not to scrub too vigorously, as this may damage the hardwood finish.
- Wipe Away Residue: After breaking down the acrylic wax, use a clean microfiber cloth to wipe away the residue. This step may require some elbow grease, but the end result will be worth the effort. Ensure that you thoroughly remove any remaining cleaning solution to prevent any potential damage to the hardwood.
- Final Rinse: For a finishing touch, dampen a clean microfiber cloth with plain water and wipe the hardwood floor to remove any remaining traces of the cleaning solution. This step ensures a residue-free, polished surface.
- Allow to Dry: Allow the hardwood floors to air dry completely before walking on them. Opening windows or using fans can expedite the drying process.
Hardwood floor acrylic wax free
With these easy and efficient techniques, removing acrylic wax from hardwood floors becomes a straightforward task. Regular maintenance using these methods will not only restore the natural beauty of your hardwood surfaces but also prolong their lifespan. By incorporating these steps into your cleaning routine, you can enjoy gleaming hardwood floors that add warmth and elegance to your living space.
Floor Cleaning Topics:
- Steam Carpet Cleaning -Summit NJ
- How to dry carpet after cleaning
- How to get rid of odor in carpets
- Basement water damage -steam carpet cleaning
- Lear how to clean wood floor
- How often should I clean my carpet?
- Best Homemade carpet cleaner
Looking for a Specialist Floor Cleaning Company near you?

General Questions
How expensive is Clean & Recoat?
Prices will vary but typically a contractor will charge you less than what they would charge you for sanding and refinishing the floor. Pricing will depend on how much time they spend cleaning a floor, the type of finish they use and the number of applications of finish they make. Get several estimates but pay careful attention to how long they will take, how they will prep the surface and the type of finish they will use. Learn More…
Is this a dusty, smelly process?
The smell of the chemicals used to clean the floors is comparable to typical household cleaners and are not toxic or hazardous. The buffers we use have dust containment systems attached to vacuums to minimize any dust from prep work. We only work with waterborne urethanes that have no offensive odors. Done correctly, Clean & Recoat is the least invasive recoating process on the market today.
How log will a Clean & Recoat last?
With proper care and maintenance and by following a common sense approach to reduce wear and damage, a floor that’s been recoated can give you years of excellent service. I’ve seen floors that I recoated more than ten years ago that are still in very good shape. Most floors that are being recoated will be getting a waterborne finish and these finishes are very good and easily maintained. Learn More…
What is Laminate Flooring?
Laminate flooring is a tongue and groove interlocking flooring system that comes in either planks or squares. All of these floors have a wear layer, a decorative print film layer, an inner core structure, and some type of backing support layer — usually melamine. The print film layer is either fused or glued to the inner core. The print film can be a photo of any real floor. The earlayer is applied to the decorative print layer to protect the pattern. Melamine resins are the main component of the wearlayer. The melamine surface gets its incredible durability from aluminum oxide. Aluminum oxide is almost as hard as diamonds and provides unsurpassed wear and stain resistance. Learn More…
What is Engineered Flooring?
Engineered flooring is produced by bonding three or more layers of wood. The crossing of grain direction within the boards makes this a very dimensionally stable product able to resist nearly all expansion and shrinkage from normal moisture changes. This is one primary feature that makes it suitable for use directly on concrete and below-grade application. Learn More…
Will my floor age or change color?
Yes. You can expect to see shade differences in your floor over time. The cause is usually from exposure to the ultra-violet rays of the sun, whether direct or indirect. This color change will be more noticeable in lighter colors, which will darken over time. In addition, certain species like Brazilian cherry, will naturally darken over the years. These changes are due to the natural characteristics of wood and are not covered by most manufacturers’ warranties.
What is Custom Finishing?
Sanding and refinishing performed to individual specifications. Custom finishing of wood floors is performed in the home on the completely installed new floor, or to refurbish a previously finished floor. Custom finishing permits the owner to select from a full range of stains, sheens and colors.